Anchor tags, also known as “jump tags”, points to a particular section on a web page and are used to jump to a particular section on a web page.
Creating An HTML Anchor
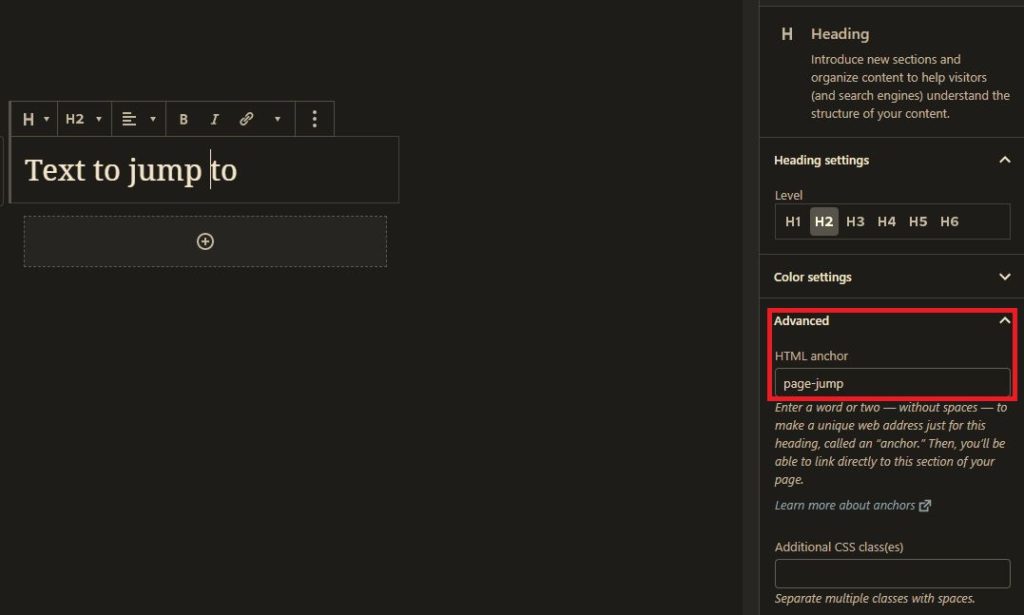
- The first step to creating an HTML Anchor in WordPress is that you have to declare a point on the page to jump to. In WordPress it must be a heading somewhere on a page. So the heading has to be created first and you also have to create an anchor link.
- The HTML anchor has to have some kind of text to declare as the anchor link (in this example we used: page-jump as denoted under the advanced section in the red square in the picture below) but the text can be any text of your choosing.
- Note: the HTML anchor can only be applied to headings [h1] – [h5], it cannot be applied to regular text in WordPress without editing HTML manually.

Setting Up An Anchor Link
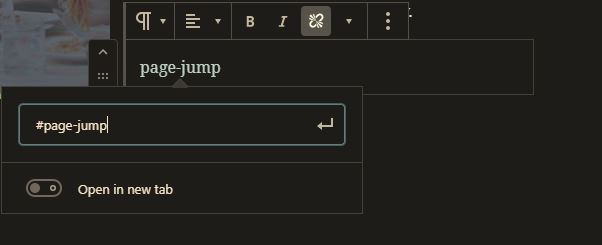
Now an anchor link needs to be set up. The link will be created just like any other link. Except instead of a URL being entered, you enter the anchor link that you created in step # 1 page with a pound/hash sign (#) in front of it (example: #page-jump)

Linking From Another Page
To link to the Anchor Link from another page you need to only add a link to the page as usual and then end the URL with a forward slash and the Anchor Link you created in step 1 (example: https://utiawpguide.tennessee.edu/linking-to-sections-of-a-page/#page-jump)
Adding An Anchor Link For A Menu
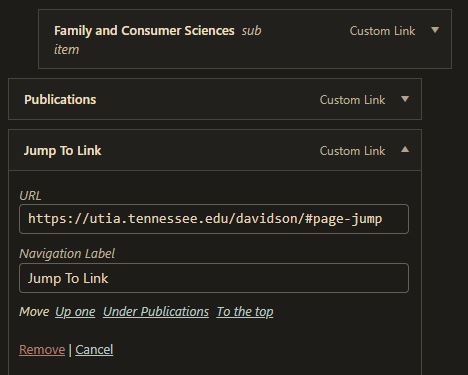
When adding an Anchor Link FOR a menu the process is identical to step #3 except you add the URL from the dashboard > Appearance > Menus. And create a “Custom Link” with the Anchor Link included just as you would with a regular URL link with a pound sign in front of the URL. (example: https://utiawpguide.tennessee.edu/linking-to-sections-of-a-page/#page-jump)
